This is a small attempt to make a facial recognition system using K Nearest Neighbor algorithm. We will be using OpenCV, Numpy and some other python packages.
Initially we’ve to create a KNN Classifier from the scratch, Those who don’t Know much about KNN classifier please read this.
Package Installation
kindly make sure you’ve installed Numpy and Open CV else please use the snippet below.
pip3 install numpy opencv-python
Project Breakdown
- Using webcam record the images
- Detect faces in the image
- Pass the facial data to a KNN model
- Get live prediction of the faces from the model
If you are new to OpenCV please read the documentation here. In order to capture the image we need to create a python script; lets name it as capture.
import cv2

cap = cv2.VideoCapture(0)

while True:
	ret,image = cap.read()
	if ret == True:
		cv2.imshow('frame',image)
		if cv2.waitKey(1) == 27:
			cv2.imwrite('savedImage.jpg',image)
			cv2.destroyAllWindows()
			break
After capturing the image with a face in it, we need to extract face out of the image. Face detection uses classifiers, which are algorithms that detects what is either face(1) or not a face(2) in an image. OpenCV uses two types of classifiers; LBP (Local Binary Points) and Haar Cascades. We will be using Haar Cascades.
What are Haar Cascades ?
A Haar Cascade is based on “Haar Wavelets” which Wikipedia defines as:
A sequence of rescaled “square-shaped” functions which together form a wavelet family or basis.
It is based on the Haar Wavelet technique to analyze pixels in the image into squares by function. This uses machine learning techniques to get a high degree of accuracy from what is called “training data”. This uses “integral image” concepts to compute the “features” detected. Haar Cascades use the Adaboost learning algorithm which selects a small number of important features from a large set to give an efficient result of classifiers.
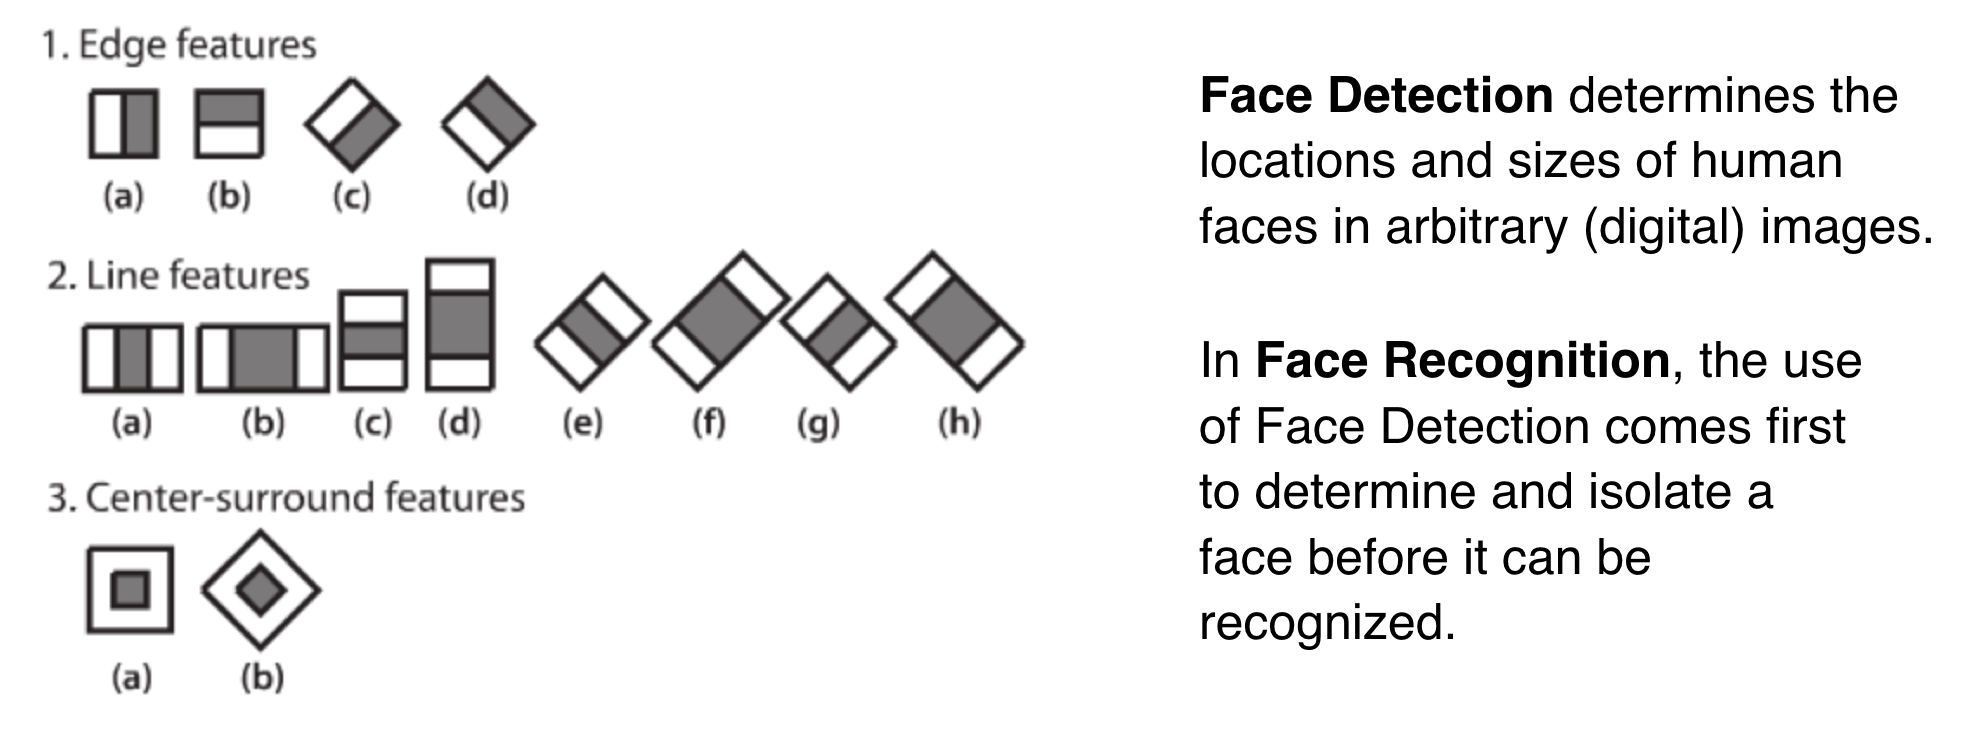
Pre-trained Haar models for frontal face is available to download here, hence we are going to use that.
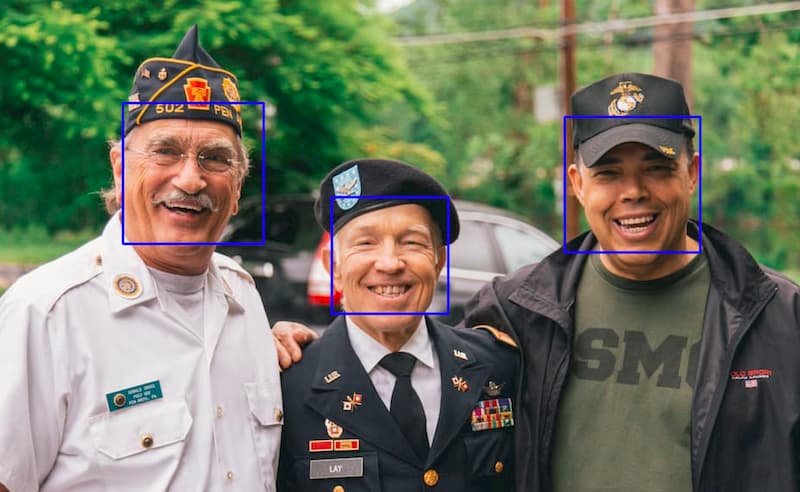
import cv2

imagePath = "/Users/adarsh/Desktop/Works/threemen.jpg"

cascadePath = "/Users/adarsh/Desktop/Works/haarcascade_frontalface_default.xml"

#create the face cascade classifier using the xml file
faceCascade = cv2.CascadeClassifier(cascadePath)

#read the image
image = cv2.imread(imagePath)

#convert the image in to gray color
gray = cv2.cvtColor(image,cv2.COLOR_BGR2GRAY)
gray= cv2.equalizeHist(gray)

# The face or faces in an image are detected
# This section requires the most adjustments to get accuracy on face being detected.
#the first parameter is the image,then the scale factor and the minimum number of neighbors

faces = faceCascade.detectMultiScale(gray,1.2,5)

for (x,y,w,h) in faces:
    #Here we are drawing rectangle over the faces detected using x,y co-ordinates and w,h height and width in blue color
    image = cv2.rectangle(image,(x,y),(x+w,y+h),(255,0,0),2)

cv2.imshow('img',image)
cv2.waitKey(0)
cv2.destroyAllWindows()
Now that we’ve detected the face, we need to store it somewhere. So here we are going to acquire the images using a webcam and we will store the captured faces in a numpy npz file, it save several arrays into a single file in uncompressed .npz format. We are going to create a face data generator file as mentioned below.
FaceDataGenerator.py
import numpy as np
import cv2

#lets define a video acquition object
name = input("Please Enter the Persons Name: ")
cap = cv2.VideoCapture(0)

cascadePath = "/Users/adarsh/Desktop/Works/haarcascade_frontalface_default.xml"

#create the face cascade classifier using the xml file
faceCascade = cv2.CascadeClassifier(cascadePath)
faceData = []
captureCount = 0
faceCount = 0
while True:
    ret,frame = cap.read()
    if ret is True:
        gray = cv2.cvtColor(frame,cv2.COLOR_BGR2GRAY)
        gray= cv2.equalizeHist(gray)

        # The face or faces in an image are detected
        # This section requires the most adjustments to get accuracy on face being detected.
        #the first parameter is the image,then the scale factor and the minimum number of neighbors
        faces = faceCascade.detectMultiScale(gray,1.5,5)
        for (x,y,w,h) in faces:
            #Here we are drawing rectangle over the faces detected using x,y co-ordinates and w,h height and width in blue color
            frame = cv2.rectangle(frame,(x,y),(x+w,y+h),(255,0,0),2)

            #extract the face out of the frame and resize it
            face = frame[x:x+w,y:y+w]
            grayFace = cv2.cvtColor(face,cv2.COLOR_BGR2GRAY)
            resizedFace = cv2.resize(grayFace,(50,50))

            #Skipping consecutive faces images
            captureCount+=1
            if captureCount/20 == 1:
                faceData.append(resizedFace)
                captureCount=0
                faceCount+=1
            #Displaying the number of captured faces Count
            cv2.putText(frame,"captured Faces = "+str(faceCount),(10,20),cv2.FONT_HERSHEY_COMPLEX,1,(72, 52, 212),2)
            cv2.putText(frame,"Collecting "+str(name)+"'s Data",(10,50),cv2.FONT_HERSHEY_COMPLEX,1,(72, 52, 212),2)
        if cv2.waitKey(1) == 27 or faceCount >=20:
            cap.release()
            cv2.destroyAllWindows()
            break
        cv2.imshow('img',frame)
#Saving the data in to npy file
data = np.array(faceData)
np.save(name,data)
Running the above script will generate a personName.npy file, which contains face data of that person. Now you’ve to generate the required persons face data by running the script again. The script can be downloaded from here